Sunday, September 8, 2013

Mollusk Mania!

I love checking out the local seafood markets in Santa Barbara and this weekend was no exception! (Especially since I had a 30% discount to use ;)) This market had a larger variety of fish than other markets, but I was in the mood for scallops. They had beautiful diver scallops and I grabbed 1.5lbs which came out to be 13 pieces. 

13 big scallops!

Look how thick that is!

The weather has been a bit hotter and I wanted to make a lighter meal, so I paired the scallops with a fresh mango, tomato, and corn salsa (I plucked the kernals off the cob myself), and brown rice.

The first thing I did was wash the scallops and hand dried every single piece of them to get rid of the excess water. I heated up some olive oil in my Le Creuset nonstick pan, placed the scallops in the pan and left them untouched for 90 seconds to let them create a golden brown crust. I was actually a bit scared to make scallops because if you don't pay attention to them for a few seconds and they overcook, they're done. Rubbery scallops suck. And these were larger and thicker which only increased my anxiety. 

The quality isn't that great, but it shows what I'm doing.

I feel bad for the scallop to the left...someone mishandled him and it wasn't me. But a great crust is forming! It smelled so good in my kitchen!!

To pair with the scallops, I made a simple mango, roma tomato, and corn salsa seasoned with fresh lemon and lime juice, green onions, ground black pepper, garlic powder, parsley, and red chili flakes. 

I've been trying to make my plates look nicer and I thought the plating of the scallops is one of my best yet! 

The finished product! 

To show the thickness of the scallops

If I do say so myself, the crust I created is amazing. I'm proud!!

SUCCESS! Not overcooked, perfectly cooked scallops.

I did not use any salt in this dish because I don't like cooking with salt and because this dish didn't require it! The scallops had a naturally sweet and briny taste to it that was enough for the entire dish. The salsa paired well with the sweetness of the scallops because of the acid I put into it. The brown rice made the meal a little heartier. I like the contrast between hot and cold and the cold salsa paired well with the hot scallops. For my first time, I'd honestly give myself an A for not making rubbery scallops and I really like the plating! I can't wait to make more!!

Until Next Time!
CheFelicia


Wednesday, September 4, 2013

Salami-yami

I'm back! I haven't been cooking as much since I've been traveling a lot. After rummaging through my empty fridge, I managed to make a delicious and easy meal to share!

I found leftover frozen tortellini, an opened jar of tomato sauce, lean ground turkey, white onions, shallots, garlic, and a large log of salami that was leftover from the beach house. I know the first six ingredients go together, but I wanted to incorporate some of the salami into the dish. My first thought was to crisp some up in the pan, but I'm not an avid fan of salami; I need to be in the mood for it, but my other half loves it.

First, I diced up the white onions, garlic, and shallots. Those are must haves in every dish I make...I love the aroma!

Great colors and aroma!

I sauteed the onions, garlic, and shallot in olive oil until they started to brown and then added the ground turkey. Seasoned it with ground black pepper, smoked paprika, garlic powder, parsley, red pepper flakes, and thyme.

Turkey browning in the pan with the onions, garlic, and shallots

Once the tortellini finished cooking, I put that in the pan with the ground turkey and added the tomato sauce. Tossed it around, added some more seasonings and that was it! For my other half, I cut some salami up and topped his bowl of tortellini with the salami.

The tortellini had an umptious and lush feel because the cheese oozed out, the sauce had a hint of sweetness, tanginess, and spiciness. The ground turkey was juicy and full of flavor. I had a bite of the dish with salami and it was good. I had crisped it up after the photo was taken, and it was a good contrast for the soft tortellini and gave the dish a good saltiness.

The finished dish! I added Cholula hot sauce to give it a little spice and to tame down the sweetness of the sauce. The salami was crisped up after this photo was taken!

Hoping I will be able to update more often!

Until Next Time!
CheFelicia


Thursday, August 15, 2013

Lobster Guts

Before I begin, I want to say Happy, Happy Birthday, Julia (Child)!! Without you, French home cooking techniques in the U.S. may still be a mystery. 

I am celebrating by watching "Julia and Julie" as I write this post! A coincidence that this post is about lobsters on Julia's birthday because cooking the lobsters remind me of the scene where Julie is terrified to death about killing them! 

There was another sale for live Maine lobsters at our local fish market, so we had to grab a few and made it into a big feast (that will be another post). I try to use every part of an ingredient because I hate wasting food and I think that was accomplished with leftover lobster (shells and all). After I boiled the lobsters and detached the abdomen (you're not really eating the tail) from the head, I saved ALL the liquid and "good stuff" aka gunk and lobster caviar from the head and the shells (for a stock). 

Doesn't look like much but it's lobstery goodness! The bottom layer is the salted water from my pot and the top layer are the thoughts the lobster had in his/her head. So much great natural flavor: salty, briny, sweetness. I could drink it by itself..

I wanted to use the lobster liquid in a simple way so the natural flavor of the lobster wasn't hidden. Then it hit me while I was looking around in my kitchen...DRY LOBSTER NOODLES! (with Japanese spicy instant noodle packages) and made in my electronic wok! This was my first time attempting this so I hoped that it worked and it did!

I plugged in the wok and set the temperature to 400 degrees. While that was heating up, sliced up some fresh garlic and chopped up green onions and tossed them into the wok to toast them out to bring a deeper flavor for the broth. Once toasted enough, I poured the broth into the wok, waited it to bubble then added the ramen noodles and poured a package of the spicy seasoning the ramen came with over the broth and noodles. Put the lid on top and waited  (hoped) this was going to work. After 7 minutes, I took the lid off and the aroma was AMAZING. I literally put my entire face into the steam for a lobster facial. I used my tongs, gave the noodles a swirl and put the lid on for a few more minutes until all the liquid had evaporated.

Garlic and green onion toasting in the wok

Electronic wok. It's not as deep as a traditional wok, but works well!

This isn't the most appetizing of photos, but the noodles are cooking in the broth. 

After the liquid evaporated, I shut the wok off and added 2 leftover lobster tails to warm them up and topped it off with more fresh green onion. And that's it! 

A few minutes later this happened! Ok, still not looking that appetizing, but all the liquid has evaporated and the noodles soaked it all up! 

The final product!

This looks pretty appetizing to me! The noodles cooked perfectly in the broth...not too al dente or overcooked; noodles had the perfect bounce per bite and juicy for "dry" noodles! One criticism I would have is that it was a bit too salty for me, but I can just add water to dilute the broth next time. The natural lobster flavor was at the forefront, so delicious! I loved finding bits of lobster meat and caviar within each bite. The green onion gave it a great freshness and crispy element.

This meal is a great way to utilize the entire product because the lobster gave its life to you. So, the next time you think about only eating the claws and abdomen (the tail are the 3 little fans at the end of the abdomen) and discarding everything else, try this recipe! I froze my shells and will use them soon as a stock.

Until Next Time!
CheFelicia


Tuesday, August 6, 2013

Pi and Hum

I've been really bad. Ever since returning from Vegas a month ago, I've hardly cooked! (so good, yet so bad). But, that kind of changed last weekend. One of my dearest friends, Salinasaur came to visit me in person (we normally use Google+ Hangout to hangout). It felt like forever waiting for her to arrive because things kept popping up and cockblocking her weekend getaway to Santa Barbara. However, she came, she saw, and she conquered Santa Barbara, although there's really not much to do here.

I wanted to surprise her with a pizza dinner. When I went up North to visit her, she took me to Tony's Pizza Napoletana for the Cal Italia pizza which has prosciutto di parma, asiago, mozzarella, gorgonzola, parmesan reggiano, drizzle of sweet fig preserve, and a balsamic reduction cooked in a 650 degree gas or 700 degree electric brick oven. It was honestly the best, best, best pizza I ever had. The gorgonzola, asiago, and parmesan are strong cheeses but the taste wasn't overwhelming, the prosciutto gave it a nice salty, briny complement to the cheeses and the balsamic reduction and fig preserve gave it a wonderful sweetness to offset the saltiness. It really is the best bite ever. My friend tempts me by sending photos of the pizza when she gets it and all I have are photos and my memory that takes me back to when I had it. 

Salinasaur surprised me with pretty gerber daisies and Cal Italia pizza!
Cal Italia. Makes me salivate every time I look at the photo.

Because Salinasaur surprised me with the Cal Italia pizza, I wanted to reciprocate, but nowhere here makes it, so I wanted to make it for her! As you may know, I'm not a fan of cheese, so when I found out about the 4 different types of cheeses I freaked out a little. Shopping for them was a pain because some markets would have 3/4 of them or other variations and I just wanted 1 market with ALL of them. I thought the Trader Joes near me would carry them but they only had half of what I needed. I went to another Trader Joes and they had everything! Just smelling the cheeses, especially the gorgonzola, a type of bleu cheese, made me not want to make the pizza, but I had too! I also bought 2 packages of Trader Joes prosciutto, pizza dough, and a package of black figs. I called 4 markets around me and they didn't have any, and Gelsons had them for $6.99/lb. I called Trader Joes 4 days in a row and they told me their shipment was stalled. Then I called the Trader Joes where ALL the cheeses were and HALLELUJAH! They had black figs for $3.79/lb!! That was the highlight of my week. 

Trader Joes haul! Items for the pizza and hummus.

To make the fig jam, I cut the figs in half (used the entire package), added a cup of water, some spoonfuls of honey (instead of white sugar), I added balsamic to the jam instead of making its own reduction, and ground black pepper. The heat was on high until I got it to bowl and then I lowered it to a simmer so it'll slowly reduce. 

Figs sliced in half

Fig jam in the making!

Fig jam reducing

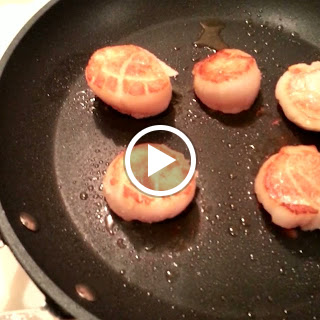
While that was cooking, I prepared the dough I had bought from Trader Joes. I split the dough in half and let them set on a lightly floured board for 20 minutes then rolled out the dough. I tried to get the dough as thin as possible since the one from Tony's is a thin crust. My oven only goes to 500 degrees, so after I rolled out the dough, I placed it in the oven for a 5-7 minutes and took it out to place the cheese on. I put the crumbled gorgonzola on the bottom and sliced up mozzarella on top. I had bought the log and my friend used the entire log for the 2 pizzas. It was a TON of cheese...I was worried the dough wouldn't hold up. I placed the pizza in the oven for 15 minutes at 500 degrees for the cheese to melt and boy was it cheesy (I got a little scared by seeing all the cheese). I took the pizza out and sprinkled the parmesan/asiago mix on top and topped it off with slices of prosciutto. I put it back in the oven for another 15 minutes, but decreased the oven to 450
degrees. When the sides started to brown and bubble, I took it out. My kitchen had an intense aroma of bleu and parmesan cheese (I wasn't a big fan of it but my other half said it smelled good). I let the pizza cool for 15 minutes and then topped it off with the fig jam! 

My odd shaped dough...it's unique! (After I took it out of the oven to pre-cook it)

Placing the prosciutto and asiago/parmesan for the final bake!

The final product out of the oven!

A slice of my version of the Cal Italia pizza with the fig jam spread on top! Yummy!

The pizza turned out great, not Cal Italia, but everyone enjoyed it! There was a bit too much gorgonzola for me, (the taste is too intense for me) but the other cheeses blended nicely together, the prosciutto was crisp and had the right amount of salt, and the jam was sweet and tangy. The crust was also cooked well. I was worried there was too much cheese for it to handle, but it wasn't soggy at all. It was crispy on the edges and just enough chewiness in the center. In all, it was a great replication of Tonys, although not as pretty. However, whenever I am up North, Tony's will still be #1 on my list! 

I also wanted to make some dip for when she came, so I also made a roasted garlic and red onion hummus. I love making my own hummus because 1. it's cheaper 2. I can control the amount of oil and ingredients that go into it and 3. it's super simple to make. 

I start off by placing whole cloves of garlic, sliced red onion, some olive oil, and ground black pepper, cayenne, and smoked paprika in tin foil and roast them in the oven for 15-20 minutes at 450 degrees. I enjoy the taste of raw garlic so I roast it where it's still kind of raw. Then I take a can of garbanzo beans and wash them in a colander to get rid of the salt/liquid they were sitting in. The beans go in my blender with the olive oil roasted garlic/red onions and I season it a little more and add fresh squeezed lemon juice and blend until smooth. Taste, adjust, and blend again until it's up to my liking. And that's it! I make pita chips with it by getting the whole wheat pitas from Trader Joes, cutting them into triangles and baking them at 400 degrees for 10 minutes. I enjoy them half crispy/half chewy. And that's it! The blender does all the work!

Roasted garlic and red onion for the hummus

Garbanzo beans and roasted garlic/red onion about to be blended up!

Hummus! Topped with a sprinkle of smoked paprika and my homemade pita chip!

I know this was a long post, but I hope you enjoy it!

Until Next Time!
CheFelicia

PS. I want to thank Salinasaur for coming to visit me! Hope you enjoyed your stay, and can't wait to see you soon!! xoxox.


Tuesday, July 23, 2013

Oodles of Nuuudons

Before I start, I wanted to say that I added another addition to my Le Creuset collection!!! This is what excites my life now, besides heels. My other half purchased the 11" Nonstick Shallow Frying Pan for me because our other pans were getting old. I have yet to use it, but he already conditioned the pan for me: washed it, put a coating of vegetable oil, rinsed it off, and dried it with a paper towel. What I really enjoy about this pan is the magnetic stainless steel base so it'll work on any stovetop/don't need to worry that it'll fall or something (I don't know how that could happen, but it could!) Also, the handle is hollow and a stay-cool stainless steel so the heat from the pan won't transfer to the handle, but that doesn't mean you should avoid wearing an oven mitt. Safety first! 

My mini Le Creuset collection!

Back to food! As I said in the "Nacho Mind" post, the rotisserie chicken lasts for 3.5 days or more for my other half and I. As I was rummaging through my fridge to see what to make with the chicken, I had leftover ingredients from the nachos, besides the corn tortillas. Then I spotted a few packages of udon and it hit me...STIR FRY UDON!

*Disclaimer: Taking photos had slipped my mind during the prepping and cooking process so I only have photos of the finished product. Sorry!

The first thing I did was boil my udon for 1-2 minutes to loosen it up and slightly cook it. Then I sliced up sweet white onions, cut fresh green beans into smaller pieces, and sliced fresh garlic. I sauté the onions first in EVOO for a couple minutes, then added the green beans. I always add garlic last so they don't stick/burn (I happen to love the taste of raw garlic!). After draining the udon, I put corn and shredded rotisserie chicken to the pan to heat it up. I added the udon and tossed everything together. I seasoned it with ground black pepper, garlic powder, red pepper flakes, and cayenne pepper. I wanted to make an Chinese type of stir fry udon so I added hoisin sauce, rice vinegar, nuoc mum, sriracha, and oyster sauce. I don't measure it out, I sprinkle it on here and there, taste and adjust. I finished it off with some fresh squeezed lemon juice. The finished product was amazing! The udon noodles had just enough chewiness and the sauce was sweet, tangy, and spicy. You get a crunch from the green beans and the green onions. I forgot to add cilantro, but that would've given it a good earthiness and cut the heat.

It's a pretty easy dish to make with simple meat leftovers or tofu. 

I realized that was a lemon seed and took it out after the photo! 

Another angle!

Until Next Time!
CheFelicia

PS! Check out my new Pinterest board at: Felicia's Food Fight Pinterest! Click here!
It's still a work in progress!

Thursday, July 18, 2013

Nacho Mind

I love Costco. Granted, my weekly Costco trips only consist of stocking back up on fruits and vegetables for the week, it is still a great experience. I get their rotisserie chicken once in a while because that 1 chicken lasts my other half and I about 3.5 days for $5.00! What?! Yeah, for real. It's crazy.

While talking to one of my dear friends and biggest supporter of me and this blog, she said "chicken nachos!" And started listing out mouth watering accompaniments to the nachos. I was going to make chicken and shrimp spring rolls, but nachos sounded way better. I needed to get tortilla chips, but wanted to make it "semi-homemade" so instead of buying chips, I bought yellow corn tortillas and decided to bake them! If I wanted it to be homemade, I would've bought masa harina to make my own masa dough ->tortillas->chips, but I hadn't intended on doing that. Maybe next time! ;)

I cut the tortillas into triangles (1 tortilla = 4 chips), and baked them at 350 degrees. I did 2 test batches prior to ensure I wouldn't mess any of the chips up. The 1st batch was made at 350 with 1 plain chip and the other brushed with olive oil. The 2nd batch had the same type of chips from the 1st batch, but I increased the temperature to 400. I preferred the plain chip that was made at the 350 temperature. It had a great crunch and no grease!

Freshly baked tortilla chips!

The best part of nachos is the cheese. I'm not a fan of cheese, but I love nacho "cheese". So artificial, but so good. I had low fat shredded mexican cheese but wanted to make a good creamy, yet healthy nacho cheese sauce. And I did it with 3 ingredients: Cheese, flour, and chicken broth! I don't eat a lot of dairy products so when I want to create something creamy and lush, I improvise and whatev happens, happens! I made chicken broth, whisked in flour and added the cheese and that was it! I would add water if it got too thick. I love spicy food, so I charred some diced up jalapenos to get their essence going then added the other ingredients. And voila! Healthier cheesy goodness.

Oozy, gooey, bubbly cheese

What is nachos without salsa? I enjoy acidic food cutting through the richness of the cheese, so I made a fresh salsa using a red onion, corn, tomato, cilantro, green onion, and squeezed the juices from a lime and lemon. Added a little ground black pepper and garlic powder and put it in the fridge for the flavors to blend together.

It looks so fresh and I love the colors!

With the chicken from Costco, I shredded it and added its juices to the salsa.

And there you have it! Simple, healthy chicken nachos! I added Cholula hot sauce to mine to give it more of a kick. The chips came out so good! They were not greasy and very crispy. I was on Google Hangout with my friend and she wanted to hear me crunch into a chip and it did! This meal for 2 people didn't even cost $2 because I didn't fully use all the ingredients! AND if you have leftover salsa and tortillas, you can make chicken tacos! BAM! Another meal.

The salsa really added a great raw crunch and freshness. These nachos won't make you feel heavy after!


Until Next Time!
CheFelicia


PS. You can check out my Instagram: Pholeeshia for photos!


Thursday, July 11, 2013

Oink Oink!

I've been busy traveling the last couple of weeks and haven't cooked as much. The food I ate while traveling will be another post. Tonight was supposed to be a "light" meal since I have been eating out a lot, but it ended up not being very light.

I was perusing my fridge and freezer trying to come up with something to make for dinner. I remembered I had pancetta from Boccalone in San Francisco and I wanted to build a dish around it. I found tortellini and broccoli and there was my dish! My other half wanted some bacon so I bought a few slices of jalapeno cured bacon from Whole Foods.


The first thing I did was boil my broccoli for 2 minutes that way it wouldn't need to completely cook in the pan and bring everything else to a halt. Using the same water, I cooked my tortellini in it.

While the tortellini was cooking, I rendered down the fat of the pancetta and bacon.

Rendering down the pancetta and bacon


Then I added diced up onion and garlic.


Once the garlic and onion became translucent, I added the broccoli.


The tortellini finished cooking, I added it to the mix and let them all mingle together. I added cayenne pepper, ground black pepper, parsley, thyme, garlic powder, and chili powder for taste.


I topped tortellini off with a poached egg to give it a creamy texture like carbonara, green onions for freshness, and some pieces of the pancetta and bacon for crunch.

Perfectly poached egg with the yolk dripping down. YUM.

It was a great meal. The pancetta had enough salt for the entire dish, the creaminess of the yolk against the tortellini left a buttery feel to the mouth, the bacon and pancetta had a great crunch, the broccoli and green onion slashed the buttery feel and gave it a fresh taste. Thinking back I should've added lemon juice for acidity, and I also have a ton of lemons. I'll add some juice to the leftovers!


                                                                     Until Next Time!
                                                                          CheFelicia